Few characters translate to nails as easily as a white cat with a bow. Hello Kitty Halloween nails take that simple shape and put it in costume: a ghost sheet, a witch hat, a pair of fangs, a pumpkin. The result is cute without being babyish, which is why this idea keeps coming back every October.
Below are 15 ideas, grouped by mood. Some are tiny and quiet, like a single bow. Others turn each nail into a little scene. Everything here is fan-style nail art inspired by the character’s well-known look (the bow, the whiskers, the round white face), not official artwork. You can read the character’s background on Hello Kitty’s Wikipedia page and the company behind her on Sanrio’s page if you want the context.
If you are new to character nail art, start with the first group. Hello Kitty Halloween nails look best when the face stays small and the colors stay limited, and the first five designs follow that rule closely. For the wider kawaii side of the season, our cute Halloween nails page is a good companion.
Classic Bow and Whisker Looks
These designs borrow only the signature details. They are the easiest to paint and the easiest to wear to work, because from a distance they look like clean, minimal nail art.
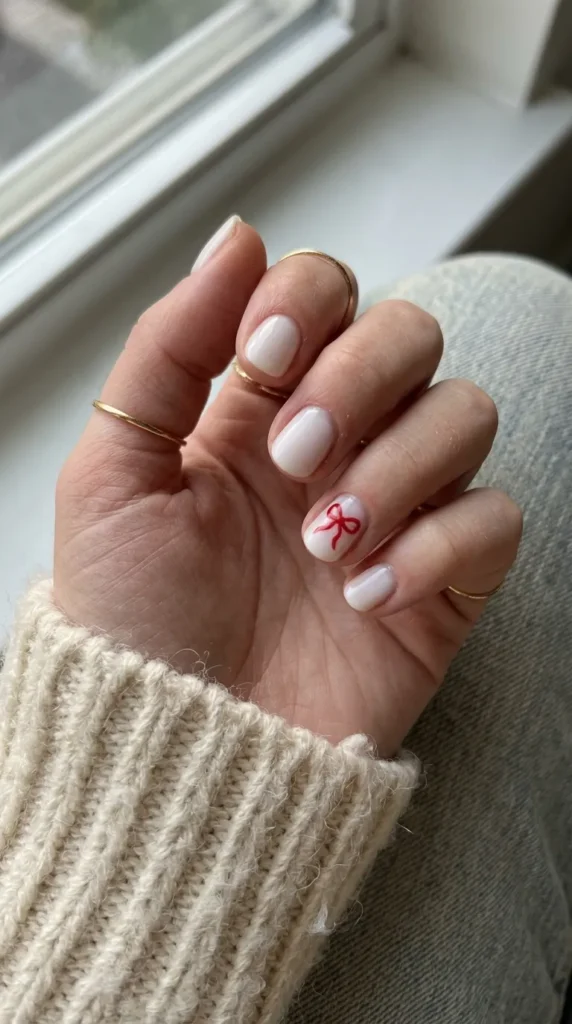
1. Red bow on a milky white base
Paint a milky white or soft cream base, then add a small red bow on the ring finger. A bow is two small triangles joined by a dot, so use a dotting tool for the center and a thin brush for the points. This is the most recognizable of all Hello Kitty Halloween nails, and it needs no face at all.
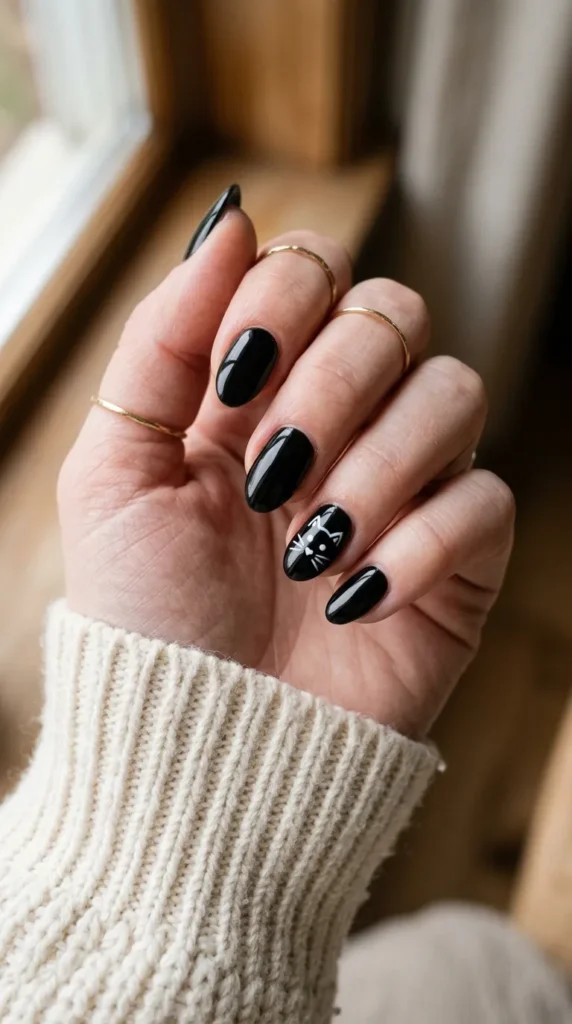
2. Tiny face outline on one nail
Draw a rounded white face on a pale pink or black nail with two dot eyes, a small yellow nose and three whisker lines per side. Keep the face small, around half the nail, and leave it on one finger per hand. Too many faces make the manicure look busy and make small mistakes obvious.
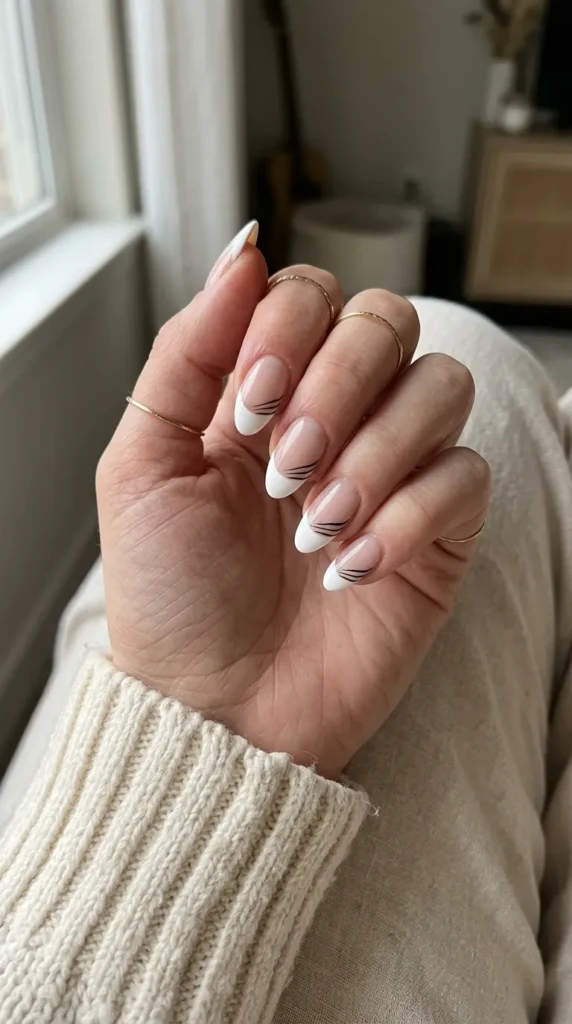
3. Whisker French tips
Paint a white French tip, then add three short black lines across the tip like whiskers. From a distance it reads as a normal French; up close you see the detail. It is a subtle option for anyone who wants Hello Kitty Halloween nails without going full costume.
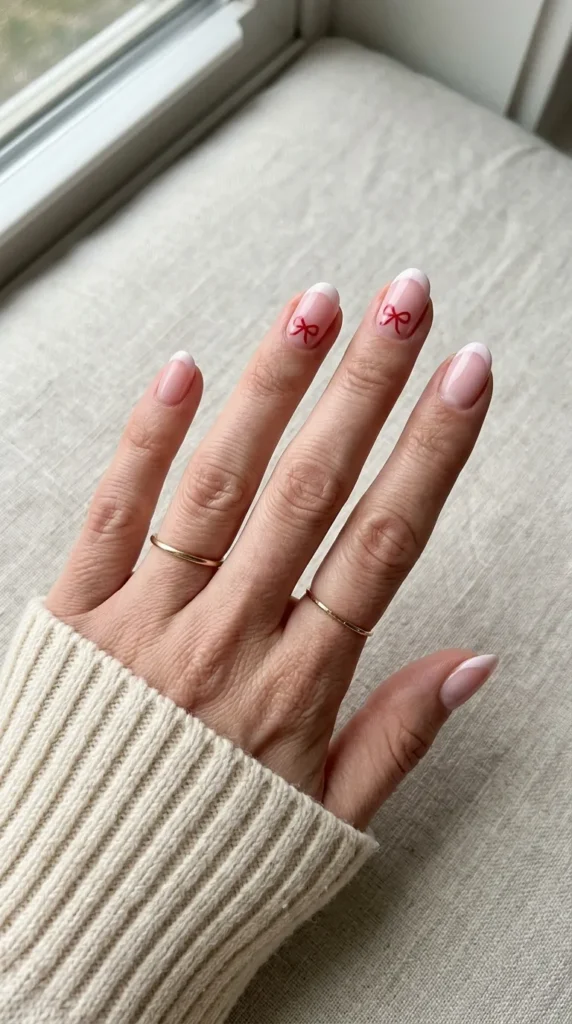
4. Mini bows on pink French tips
Use a baby pink base with white tips and place a tiny red bow where the tip meets the base on two fingers. The red adds a Halloween warmth to an otherwise spring-looking set. Use a very thin brush, because the bow is only a few millimetres across.
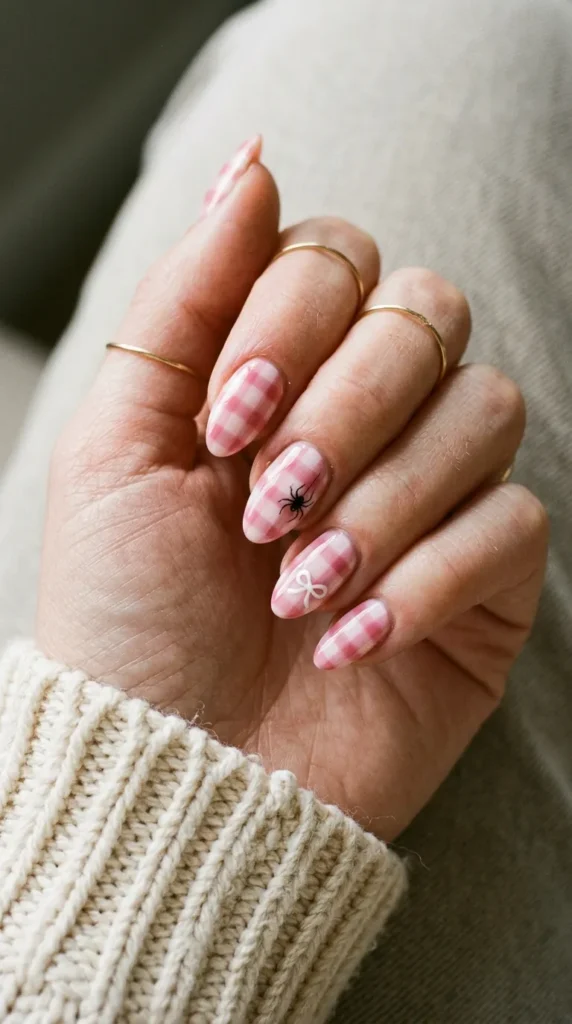
5. Pink gingham with a bow
Gingham works because it needs no precision: lay down pink, add pale stripes in both directions, and finish with a white bow on the thumb. Add a single black spider on the ring finger and the set quietly becomes Halloween.
Kitty in Costume
This is where the character meets the holiday. Each design below dresses the cat in a classic Halloween outfit. They take more time, so use a fine detail brush and let each layer dry before drawing the next.
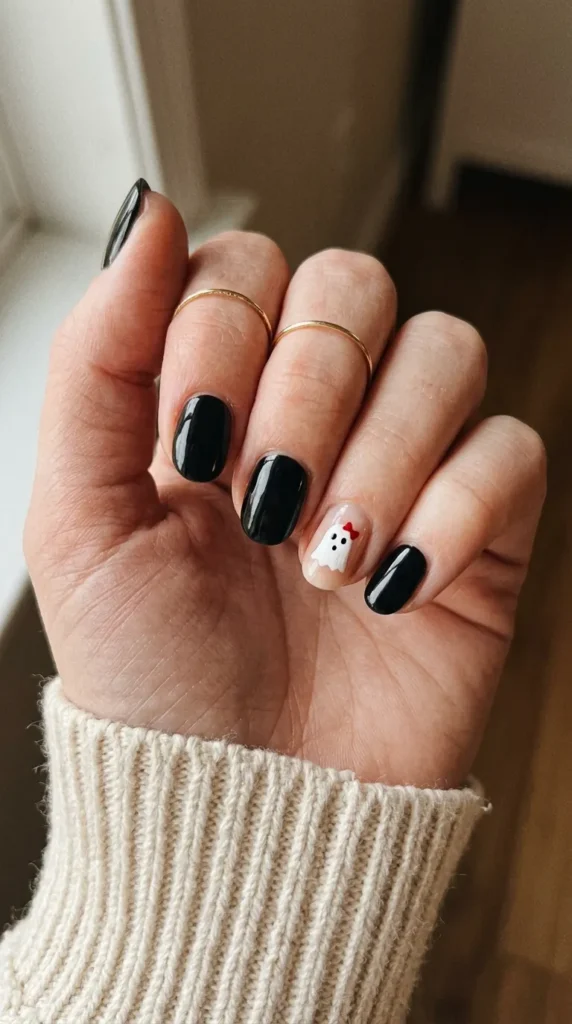
6. Ghost kitty
Draw a white ghost sheet over a black or deep purple base, leave two small eye holes, and add the red bow on top of the sheet. The bow is what turns a plain ghost into a Hello Kitty Halloween nails idea. A black base makes the white pop, so choose a glossy black if you want the strongest contrast.
7. Witch hat kitty
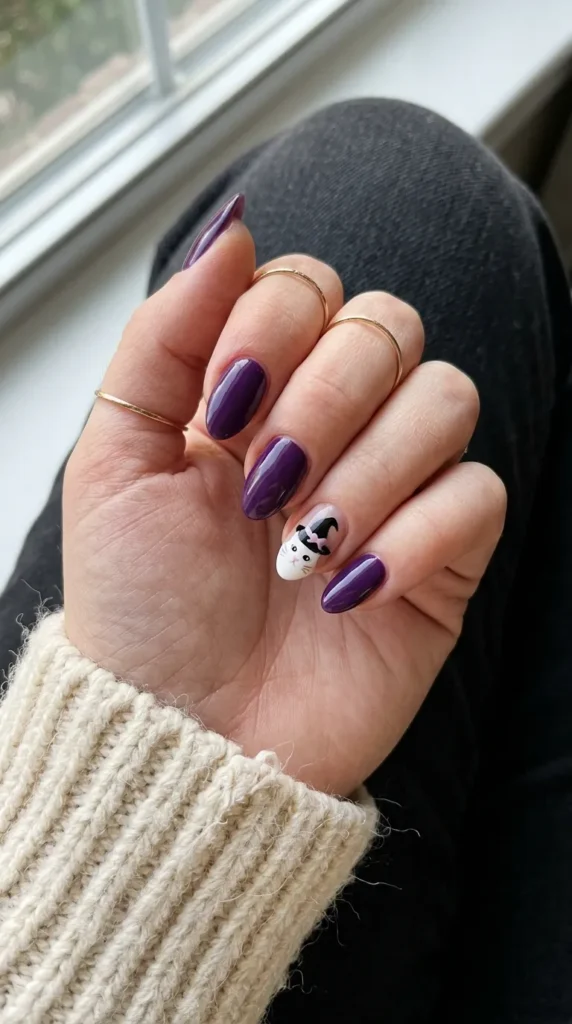
Paint a purple base and add a small black pointed hat above a white face. Finish with a pink bow tied around the hat. Because the hat is just a triangle and a brim, it works on short nails and is a nice step up from the single-bow versions.
8. Vampire fangs and a red drip
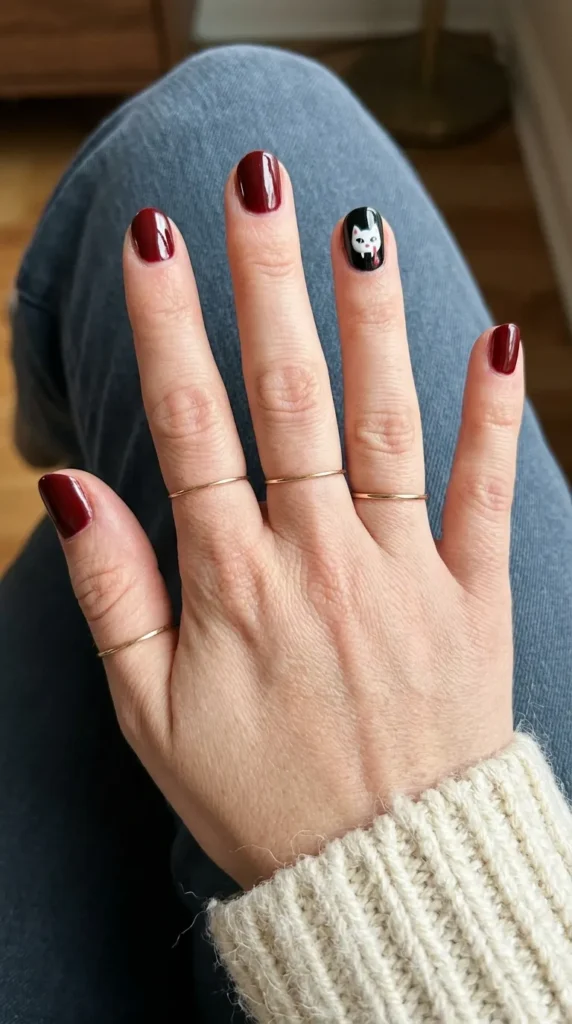
Use a white face with two small fangs peeking from the mouth and a thin red drip from one corner. Keep the drip short, so it reads as a cartoon vampire and not something gory. It pairs well with a deep red or black base on the other nails, similar to our vampire nails.
9. Mummy bandages
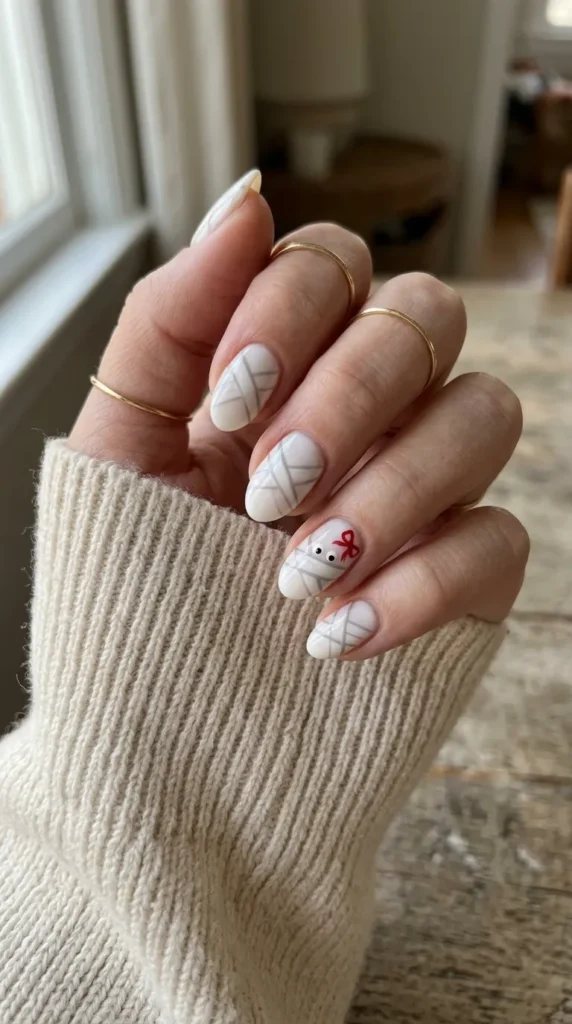
Paint a white base and add thin crisscross lines in light gray to look like bandage wraps, leaving a small gap for two eyes. A bow on one corner finishes the character. This is a gentler, almost pastel version of a mummy, so it suits people who do not like dark nail art.
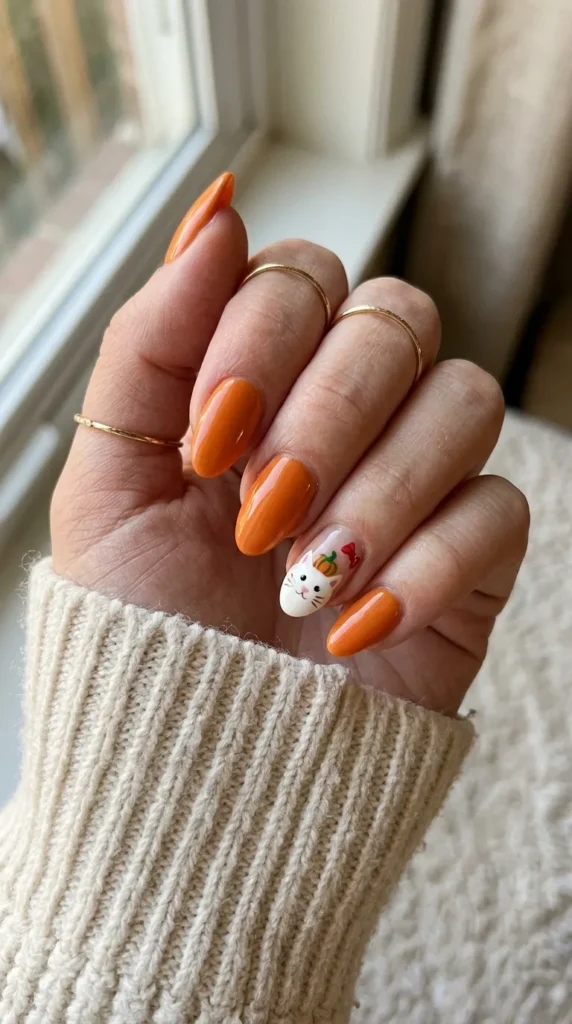
10. Pumpkin kitty
Paint an orange base and add a white face with whiskers and the bow in the corner, or draw a small pumpkin stem on top of the nail. It is the most seasonal of the costume looks and the easiest to match with an autumn outfit.
Darker and Moodier Versions
If the classic pink-and-white style feels too sweet, these designs keep the character but change the mood. Black, deep red and gray do most of the work.
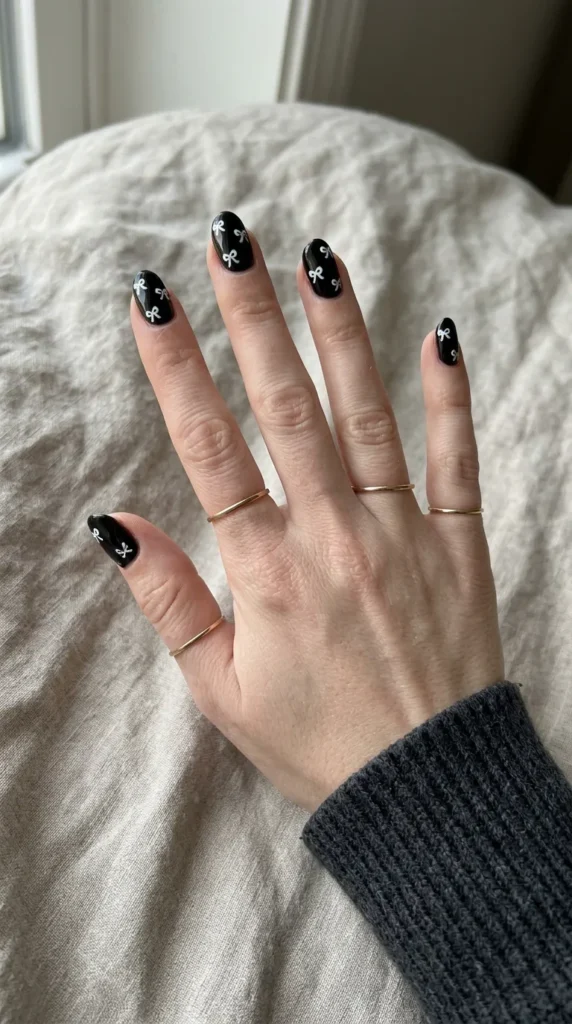
11. Black base with white bows
Cover the nails in glossy black and scatter small white bows across them, a different position on each nail. It is an easy way to wear Hello Kitty Halloween nails in a darker palette, and there is no face to get wrong.
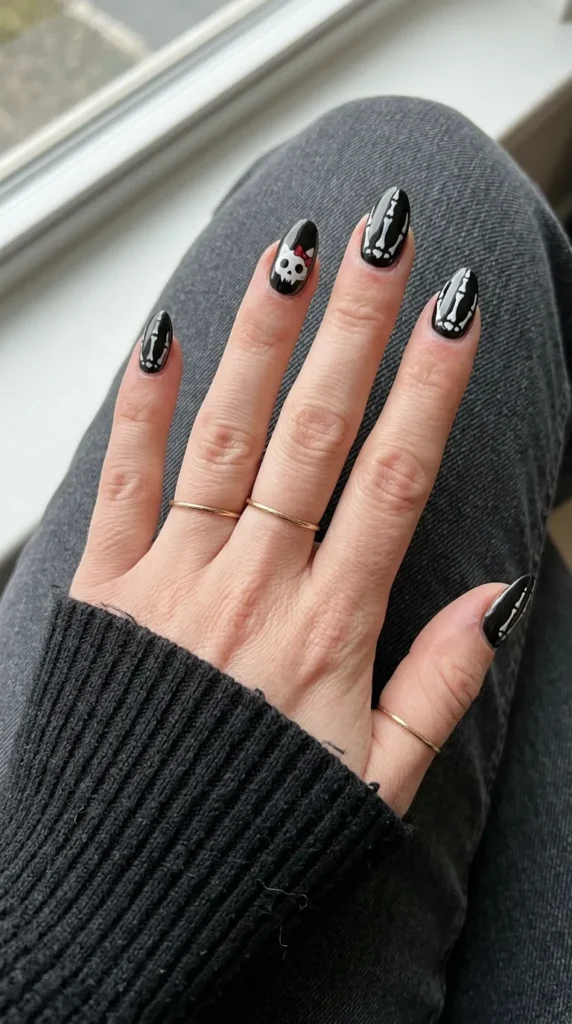
12. Skeleton kitty
Draw thin white bone lines down the finger and a small skull-like cat face on the ring finger, with the bow in red. Keep the lines thin. If the bones are too thick, the design starts to look like a different character.
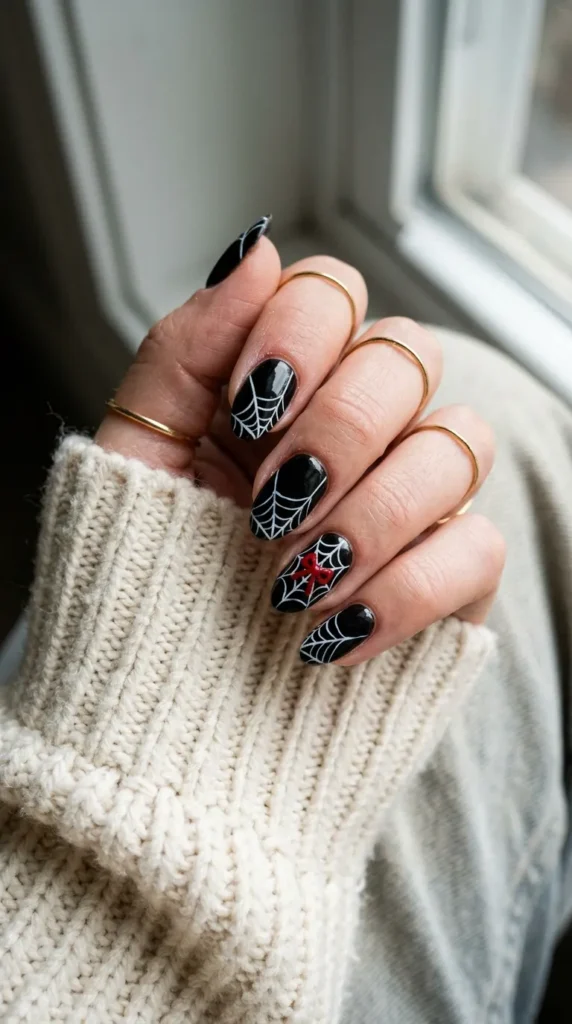
13. Spiderweb with a red bow
Draw a white or silver web on a black base, then place a single red bow where the web lines meet. A small spider hanging from one line is optional. This is a good beginner design because the bow is the only detail that needs care.
14. Bat-wing kitty
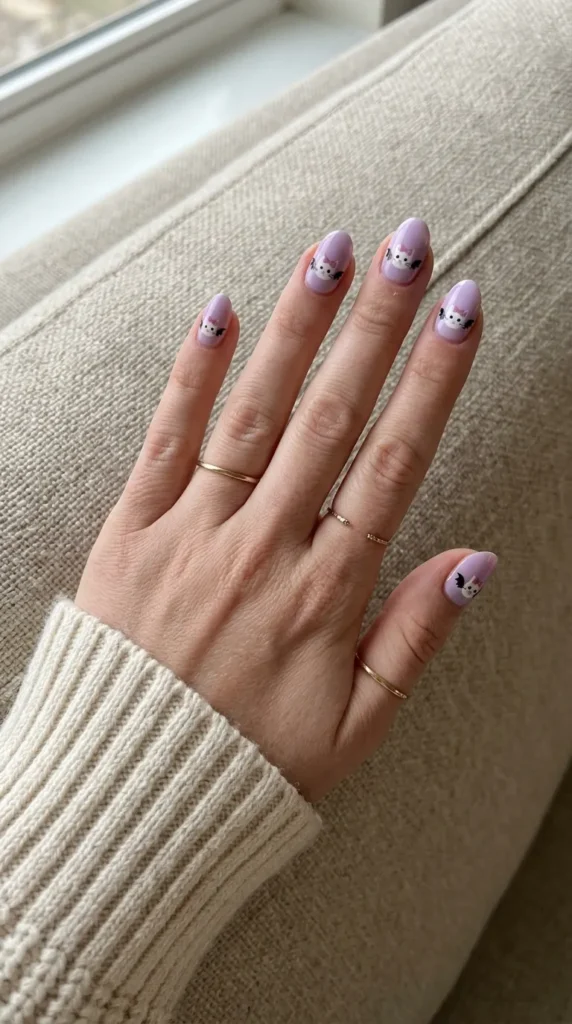
Give the white face two small black bat wings, one on each side, and add a pink bow between the ears. On a pale pink or lilac base it looks sweet. On a dark base it looks almost gothic.
15. Candy corn stripes with a bow
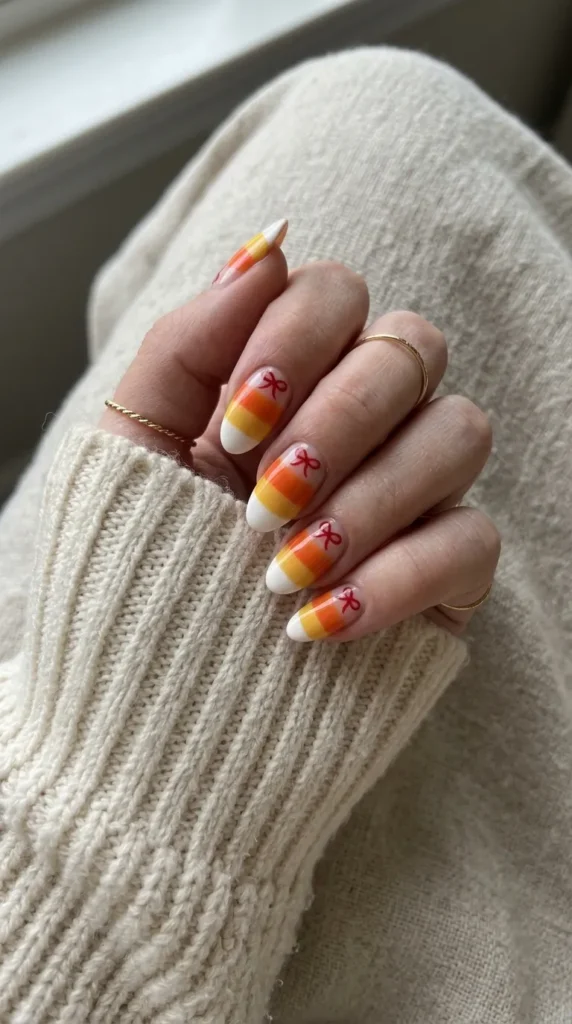
Paint horizontal stripes in white, orange and yellow, then add a small red bow at the cuticle. It looks like candy corn at first glance, and the bow is the detail that links it to the character.
Colors and Finishes That Keep the Character Recognizable
A character design only works if people can recognize it, and that depends on a few choices. Keep the face white, the bow red or pink, and the whiskers dark and thin. If you change all three at once, the cat turns into a generic animal. Hello Kitty Halloween nails stay readable when at least two of those three details are left alone, and you only change the background color or add a costume piece.
Finish is the second choice. A glossy top coat makes the white look clean and the red look rich. A matte top coat suits the darker skeleton and bat designs, but it can make white look chalky, so use matte on the base and gloss on the character. Glitter and chrome are best kept to the background, because they distract from small details.
Hand-Painted, Stickers or Press-Ons?
There are three ways to get Hello Kitty Halloween nails, and each has trade-offs. Hand-painting gives you full control and costs the least, but it takes steady hands and a fine brush. Nail stickers and decals are faster and neater for faces, but they can lift at the edges if they are not sealed with a top coat. Press-on sets save the most time. Our guide to press-on nails explains how to choose a set and apply it so it lasts.
Whichever route you take, seal everything with a clear top coat and cap the free edge of the nail. The white used in these designs is the first thing to chip, and a chipped white face is more noticeable than a chipped plain color.
Length matters, too. On short nails, one character nail per hand is plenty. On longer nails you have room for a full face. If your nails are short, see our short Halloween nails for layouts that suit the small space.
A last practical point about character art: it is meant for personal use. If you plan to sell sets or use official artwork commercially, you need to work with the rights holder. Hello Kitty Halloween nails painted for yourself or a friend are a different matter from products sold under the character’s name.
Keep Exploring Halloween Character Nails
If you like a cartoon theme, you will probably enjoy our Snoopy nails and the wider Halloween character nails roundup. For an easier start, the simple Halloween nails page has designs you can finish in under an hour. Whichever you pick, Hello Kitty Halloween nails are a good way to try character art, because the shapes are simple and forgiving.
Frequently Asked Questions
What do Hello Kitty Halloween nails look like?
They usually combine the character’s red bow, white face and whiskers with Halloween themes, such as a ghost sheet, a witch hat, fangs or a pumpkin. Many versions use only the bow, which keeps the design simple and wearable.
Are Hello Kitty Halloween nails hard to do?
The bow, whisker French and gingham are beginner friendly. Full faces and costumes need a fine brush and patience, so practice on a nail tip or paper first.
Can I wear them to work?
Yes. The bow-only and whisker French looks are subtle enough for most workplaces. Save the skeleton and vampire versions for parties.
What nail length works best?
Short to medium nails suit most designs. Larger faces and costume scenes look better on medium or long nails, where there is more space.
Which colors go with Hello Kitty Halloween nails?
White, red and pink are the classic trio. For Halloween, add black, purple or orange as a base, and keep the character details in white and red so they stay recognizable.
Compare Before You Choose
See the Closest Alternatives
Compare nearby shapes, colors and finishes before picking a final reference.
Recommended Next