Acrylic nails look great until they grow out, lift, or start to catch on everything. When that happens, a salon appointment is not your only option. This guide walks you through how to remove acrylic nails at home, step by step, with the two methods that actually work: the soak-off foil method and a warm soak. Done patiently, learning how to remove acrylic nails at home can leave your natural nails intact instead of thin and peeling.
The whole process takes about 30 to 45 minutes, and most of that time is just waiting for the acetone to do its work. What matters most is what you do not do: never rip, peel, or pry acrylics off, because that pulls up layers of your natural nail with them. If you wear gel polish rather than acrylics, our guide on how to do gel nails at home covers that routine separately. And if you are already planning your next set, our nail shapes guide and elegant nails ideas can wait until your nails have had a short recovery break.
Acrylics are a form of artificial nail enhancement built from a liquid monomer and powder polymer that harden into a strong overlay. Knowing what you are dissolving, and why pure acetone is the solvent that works, makes the whole process less intimidating. Below you will find the supplies, both removal methods, and the aftercare that helps your natural nails bounce back.
Before you start, set aside an uninterrupted half hour and a clear table. The first time you learn how to remove acrylic nails at home, everything takes a little longer: wrapping foil neatly, judging when a nail is ready, and pushing off the softened product without rushing. That slower pace is a good thing. Rushing is the one mistake that turns an easy removal into damaged nails, so treat the timer as your friend and let the acetone do the hard work.
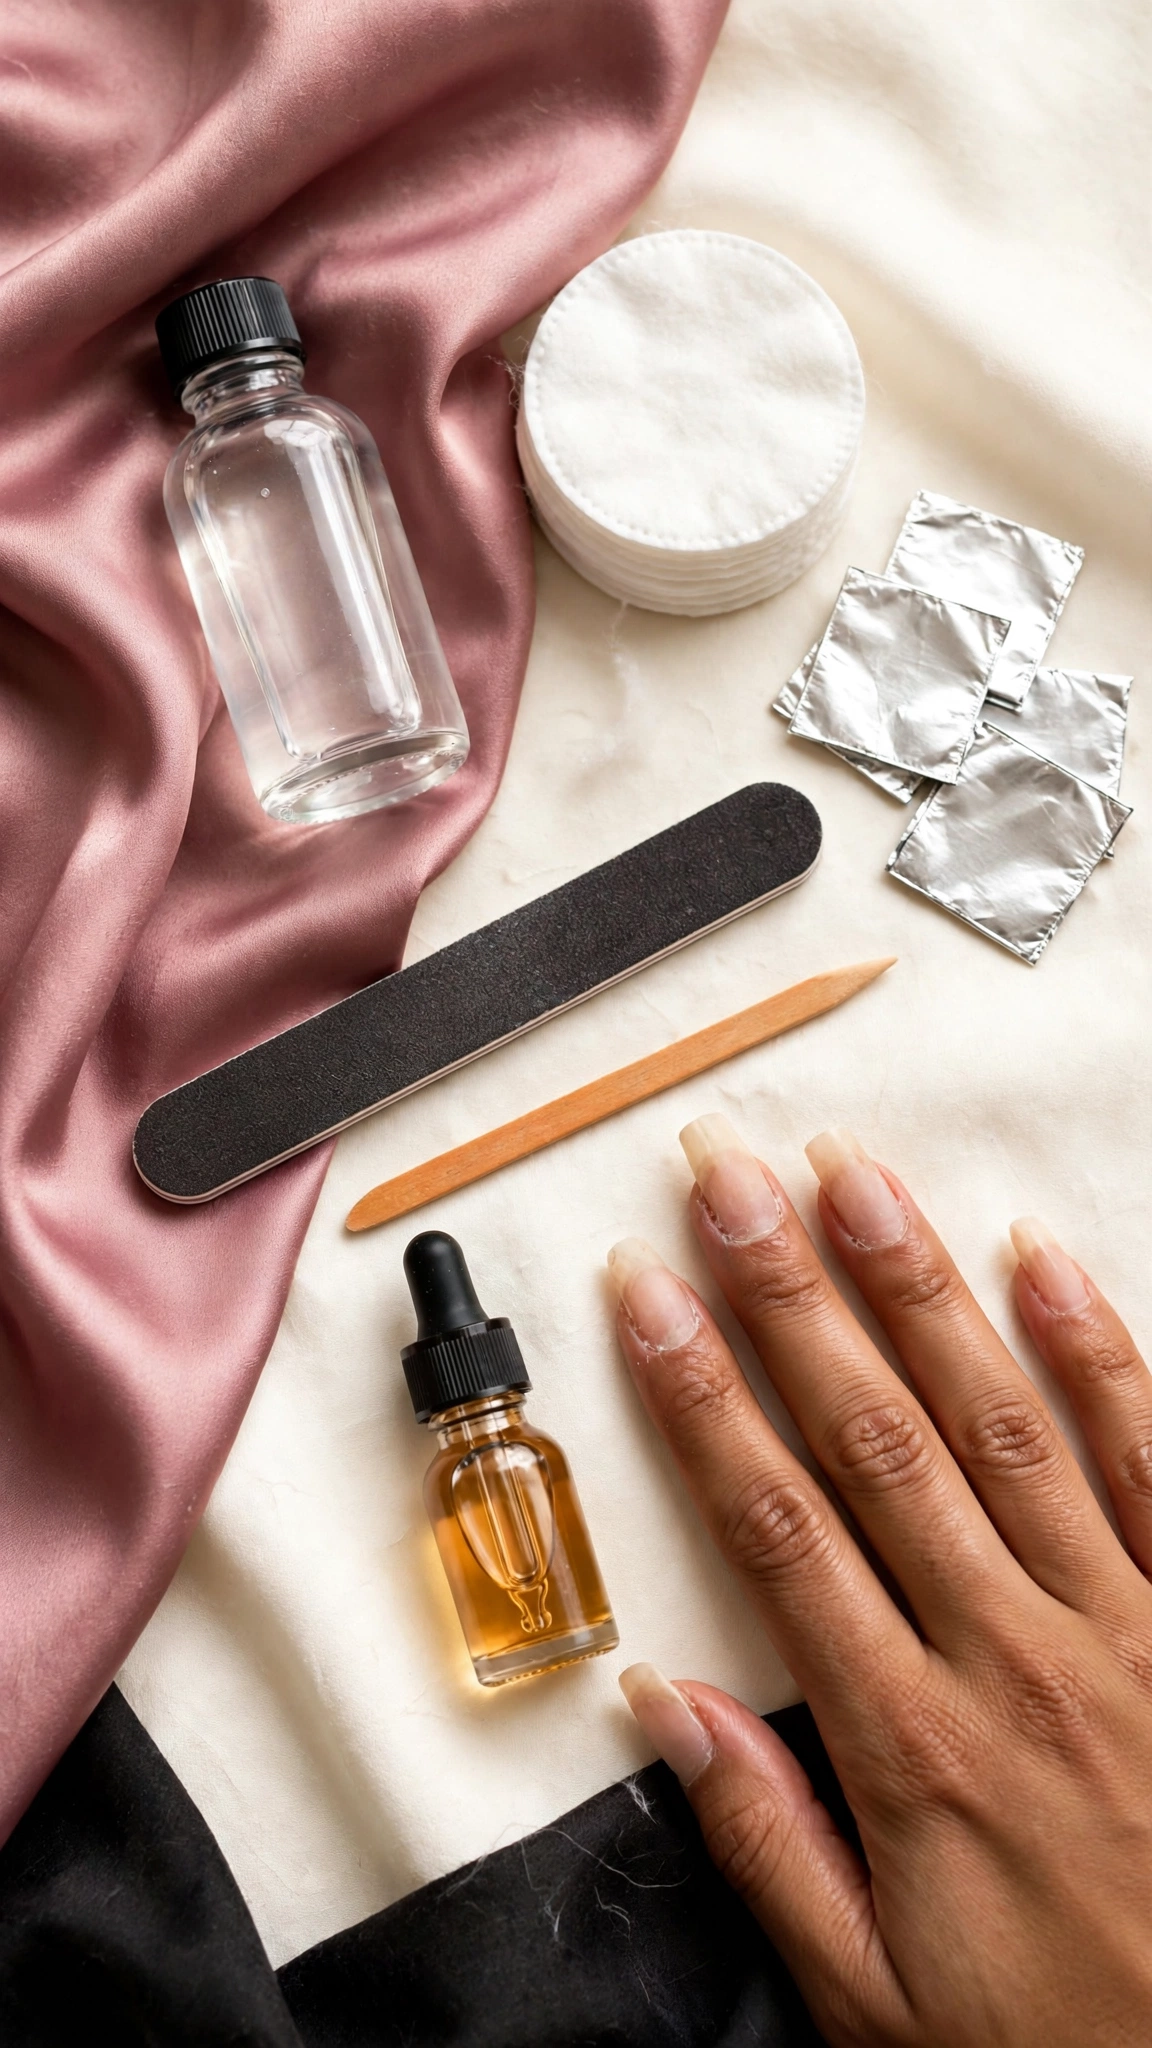
What NOT to Do When Removing Acrylic Nails
Before anything else, here is the rule that protects your nails: never force acrylics off. Ripping or peeling lifts the top layers of your natural nail plate, leaving nails thin, bendy, and sore for weeks. Prying with a metal tool or another nail has the same effect, and biting them off is worse. It can crack the natural nail and invite infection around the cuticle.
If an acrylic will not budge after a full soak, it is not ready yet. Re-wrap it and give it another ten minutes rather than forcing it. A little patience here is the difference between nails that recover in a week and nails that need a month. The same goes for filing: file the acrylic, never your natural nail, and stop as soon as you reach the thin layer closest to your own nail.
One more thing to avoid: skipping the acetone and trying to soak acrylics off in plain water or regular polish remover. Neither dissolves the product properly, so you end up picking at it for an hour and damaging the nail anyway. If you want to know how to remove acrylic nails at home without damaging them, the honest answer is that acetone and patience are non-negotiable.
Finally, respect the acetone itself. Work in a ventilated room, keep the bottle capped when you are not pouring, and keep it away from flames, stoves, and candles. Acetone dries skin quickly, so it is normal for your fingertips to feel tight afterwards. That dryness is exactly why cuticle oil and hand cream are part of the process, not an optional extra.
What You Will Need
Gather everything before you start. Once your nails are wrapped in foil, you will not want to go hunting for supplies. You need pure acetone, not regular nail polish remover, which is far too weak to dissolve acrylic. Add cotton balls or pads, aluminum foil cut into small squares, a coarse nail file, an orangewood stick or cuticle pusher, a soft buffer, cuticle oil, a rich hand cream, a small bowl, and an old towel to protect your table.
Work somewhere well ventilated, because acetone fumes are strong, and keep the bottle away from any flame or heat source. Acetone is flammable, so never warm it in a microwave or over direct heat. A warm water bath around the bowl is the safe way to warm it if you choose the soak method below.

- Pure acetone — the only solvent that reliably dissolves acrylic; regular remover will not work.
- Cotton balls or pads — soaked in acetone and placed directly on each nail.
- Aluminum foil squares — wrapped around each fingertip to hold the cotton in place.
- A coarse nail file (100/180 grit) — for clipping the length down and breaking the top-coat seal.
- An orangewood stick or cuticle pusher — for gently pushing off softened acrylic.
- A soft buffer — for smoothing the nail surface afterwards, used lightly.
- Cuticle oil and hand cream — acetone is very drying, so aftercare starts immediately.
- A small bowl and an old towel — for the warm soak method and for protecting your work surface.
One note on buying acetone: look for pure acetone at a beauty supply store or pharmacy, and check the label. It should say 100% acetone, not acetone-free or conditioning remover. The pure version is what makes learning how to remove acrylic nails at home straightforward, because weaker products stall halfway and leave you filing at a half-dissolved layer.
Method 1: How to Remove Acrylic Nails at Home with the Soak-Off Foil Method
The foil method is the most reliable way to learn how to remove acrylic nails at home, because it keeps the acetone in close contact with each nail instead of letting it evaporate. Work through one hand at a time if this is your first time, so you always have one free hand.
Doing one hand at a time also makes the timing easier to manage. You wrap five nails, set one timer, and check all five together, instead of juggling ten wraps at once. Once you are comfortable with the rhythm, you can do both hands together, but there is no prize for speed here. The method works the same either way, and the one-hand approach is how most first-timers get the cleanest result.
Step 1: Clip and File Down the Length

Clip the free edge of each acrylic down to a short, comfortable length with nail clippers, taking care not to cut into your natural nail. Then file the shiny top coat off the surface of every nail with your coarse file. The goal is to break the seal and give the acetone a way in, not to file the acrylic away completely. Stop filing when the surface looks dull and matte all over.
This step is what makes the difference between a 20-minute soak and an hour of frustration. A sealed top coat blocks acetone almost entirely, so nails that skip the filing stage barely soften at all. This prep work is the unglamorous part of how to remove acrylic nails at home, but it decides whether the soak works in 20 minutes or drags on for an hour.
Step 2: Soak Cotton in Pure Acetone

Soak a cotton ball or pad in pure acetone until it is wet but not dripping, and place it directly on top of the nail. The cotton should cover the whole acrylic surface. If you are working one hand at a time, prepare five cotton pieces and five foil squares before you start wrapping.
Use pure acetone, not acetone-free remover. Anything weaker will soften the surface slightly and then stall, leaving you picking at a gummy layer that never fully releases.
Step 3: Wrap Each Nail in Foil

Wrap a foil square snugly around each fingertip, folding the end over to hold the cotton in place. The wrap should feel secure but not tight enough to cut off circulation. Repeat for all five nails, then set a timer and leave your hand alone.
If a wrap comes loose, re-wrap it right away. A loose wrap lets the acetone evaporate, and that nail will lag behind the others when you check them. A snug wrap is what makes the soak-off version of how to remove acrylic nails at home so reliable, so it is worth taking an extra few seconds on each finger to get the foil tight.
Step 4: Wait 15 to 20 Minutes and Check

Wait a full 15 to 20 minutes before unwrapping anything. When the timer goes off, unwrap one nail and test it: the acrylic should look soft, crumbly, or lifted at the edges. If it still feels hard and firmly attached, re-wrap that nail and give it another ten minutes.
Resist the urge to check every two minutes. Each unwrap lets acetone escape and cools the nail, which slows the dissolving process down rather than speeding it up.
Step 5: Gently Push Off the Softened Acrylic
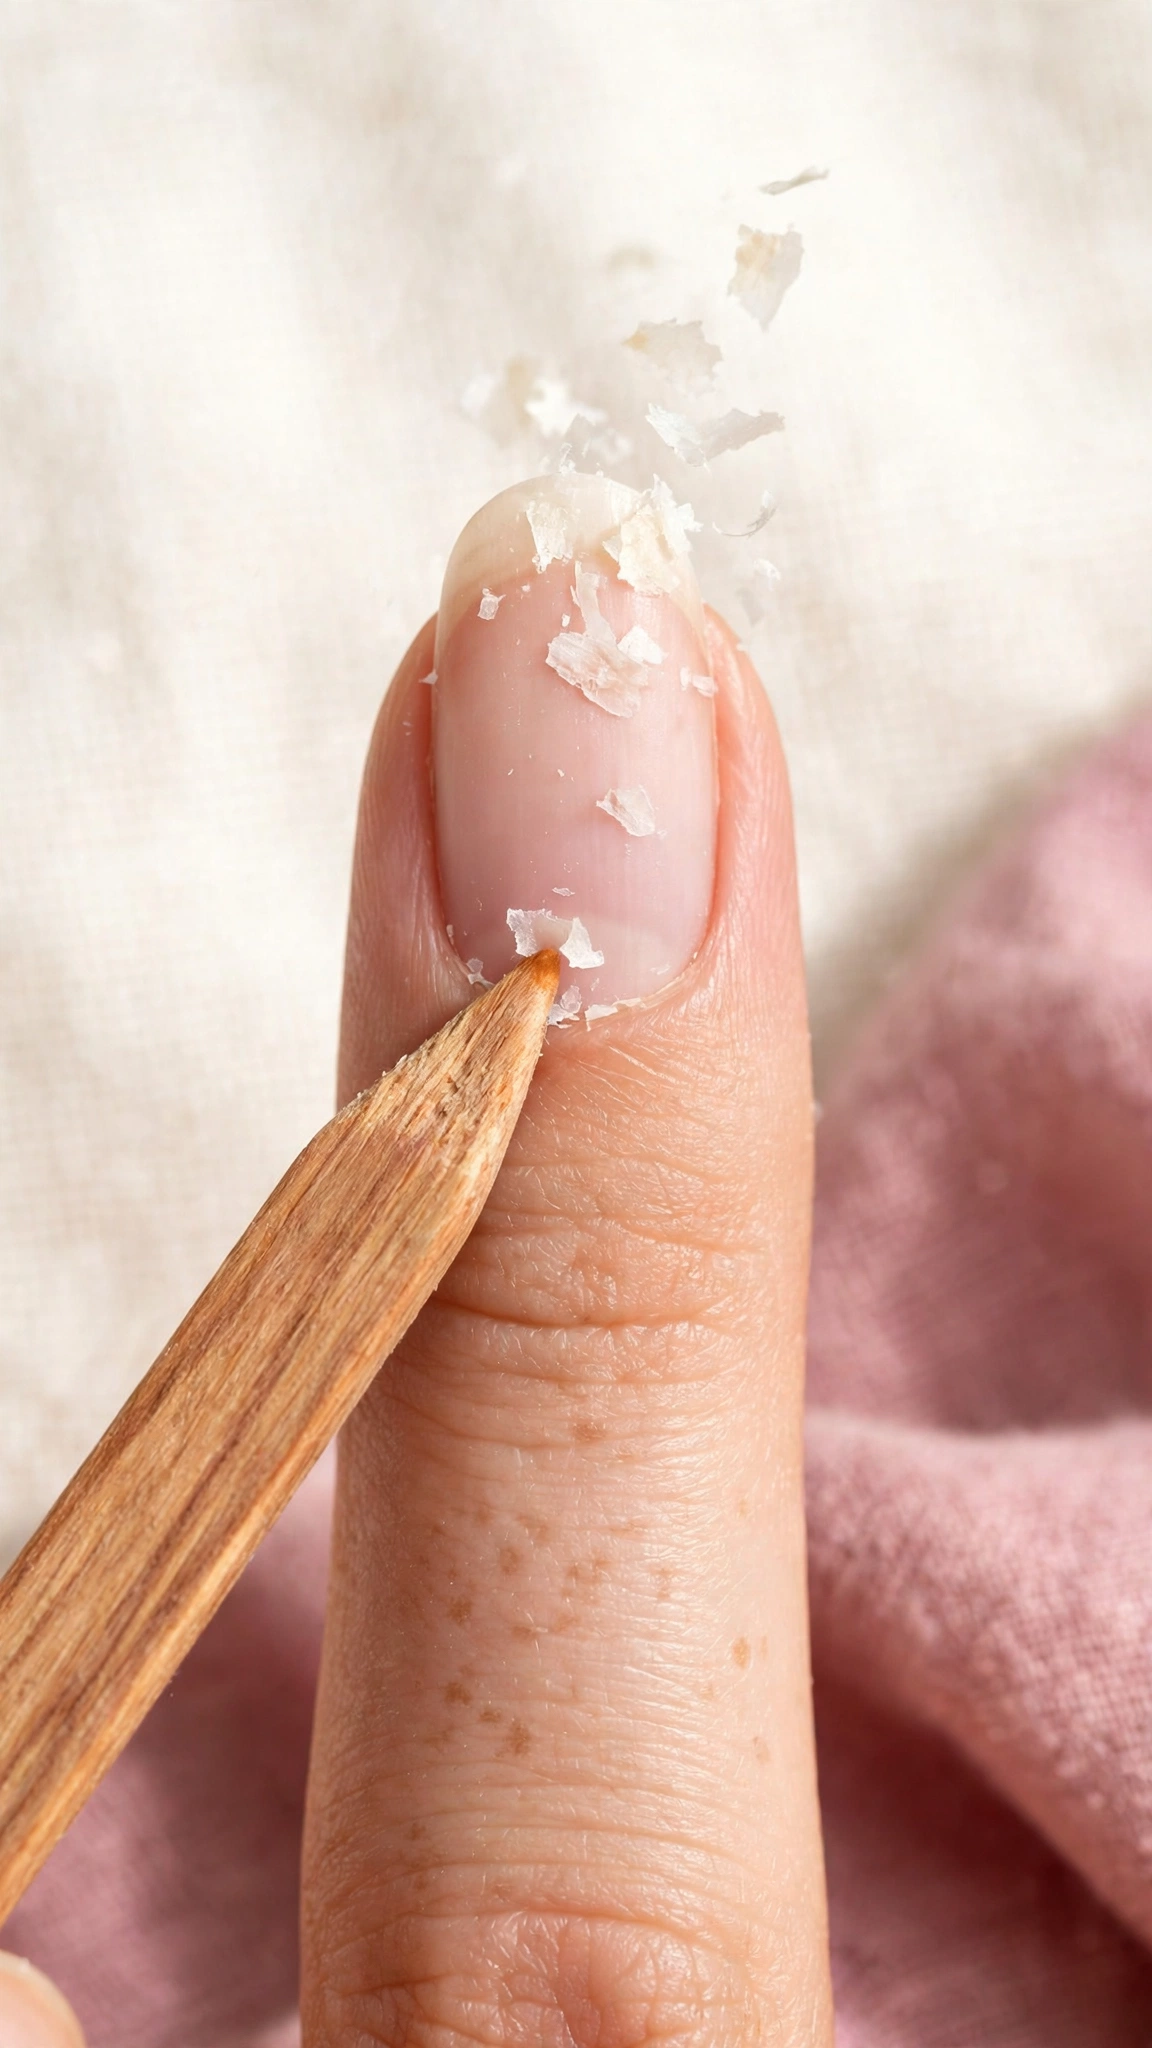
Working from the cuticle toward the tip, use an orangewood stick to gently push the softened acrylic off the nail. It should come away in soft flakes or sheets. If any spot resists, do not force it. Re-wrap that nail with fresh acetone cotton for another ten minutes and try again.
This is the moment where patience pays off. Nails that are pushed off only once they are fully softened keep their surface layers intact, which is exactly how to remove acrylic nails at home without ending up with paper-thin nails. If you remember one thing about how to remove acrylic nails at home, make it this: softened acrylic should push off with almost no pressure at all.
Step 6: Buff Lightly and Wash Your Hands

Once every nail is free of acrylic, buff the surface very lightly with a soft buffer, just enough to smooth away residue. Then wash your hands with soap and warm water to remove all acetone, and dry them thoroughly. Your nails will look dull and dry at this point, which is normal, and the recovery section below fixes that.
Do not buff aggressively to chase a perfectly smooth surface. Your natural nails are at their most vulnerable right after removal, and heavy buffing thins them further.
Method 2: How to Remove Acrylic Nails at Home with a Warm Soak

The warm soak method is the second way to handle how to remove acrylic nails at home, and it suits people who find foil wraps fiddly. File the top coat off exactly as in Method 1, then pour pure acetone into a small bowl and set that bowl inside a larger bowl of warm water. Never heat acetone directly: the warm water bath warms it gently and safely.
Soak your fingertips for 15 to 20 minutes, then check one nail. The acrylic should be soft and ready to push off with an orangewood stick, just like the foil method. If it resists, soak for another ten minutes. The rhythm is the same as the foil method for how to remove acrylic nails at home: soak, check, push gently, and repeat if needed. This method uses more acetone and takes a little longer, but it works, and it is a good fallback if you run out of foil.
One caution: keep the room ventilated and keep the bowl away from flames, stoves, and candles. Acetone vapour is flammable, and an open bowl releases more of it than foil wraps do.
Which method should you choose? If you have foil and cotton on hand, Method 1 is faster and uses less acetone. If you do not, Method 2 gets the same result with a bowl. Either way, the skill that matters is the same: knowing how to remove acrylic nails at home means knowing when the product is soft enough to push off and when it needs more time, and both methods teach you that judgment in a single session.
After Removal: Nail Recovery
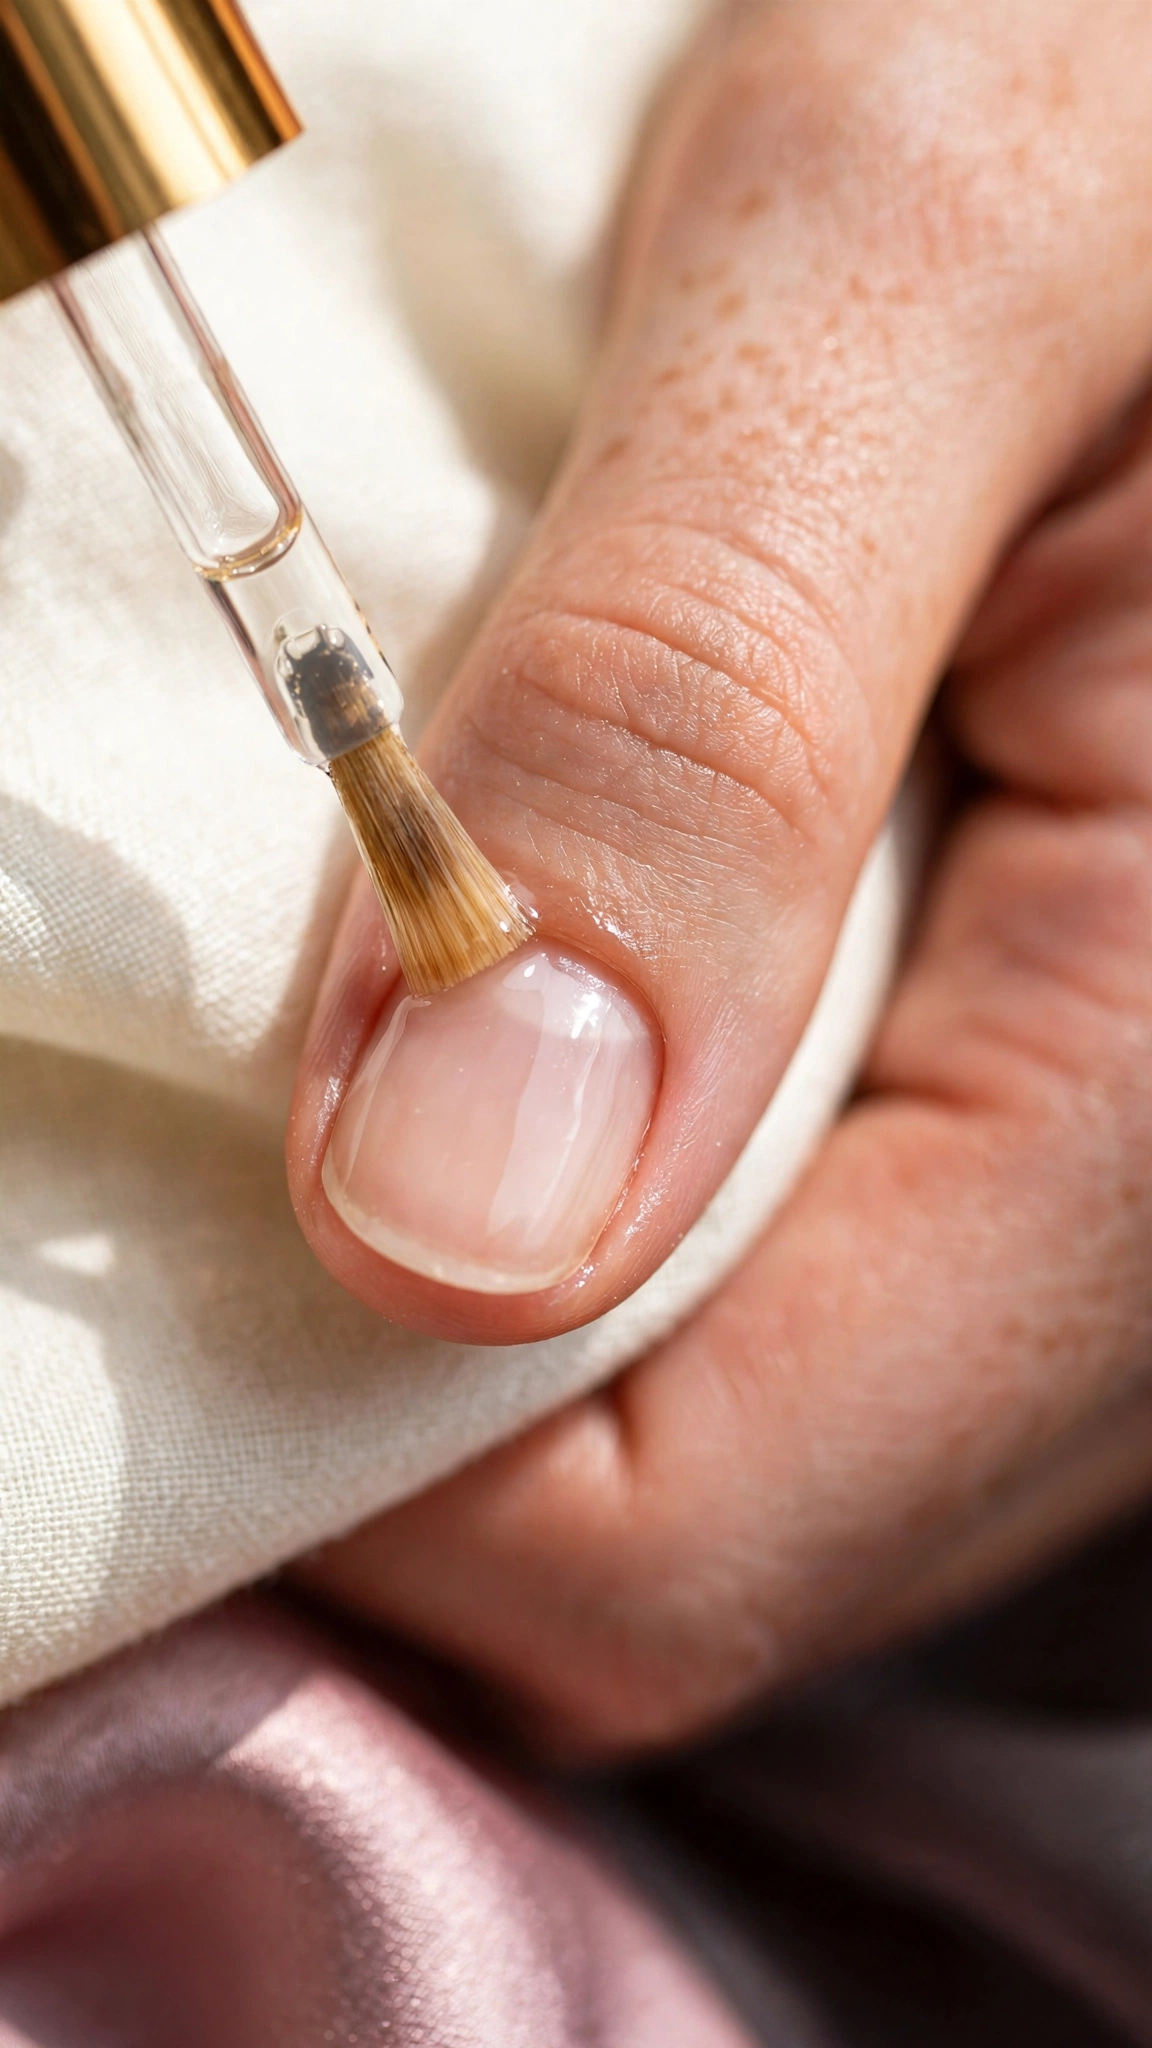
Your nails may look dry, thin, or slightly ridged right after you remove acrylic nails at home. That is normal, and it is usually temporary. Start cuticle oil the same day, massaging a drop into each nail and cuticle morning and night, and follow with a rich hand cream. According to the American Academy of Dermatology, keeping nails moisturized and avoiding harsh chemicals helps them recover their strength.
Keep your nails short for a week or two, and give them a break before your next set of enhancements. A clear strengthening base coat can protect them while they recover, but skip anything that requires harsh removal. Most nails feel normal again within two to four weeks, and the healthier your aftercare routine, the faster that happens.
What should recovery actually look like week by week? In the first few days your nails may feel bendy and look dull, which is the acetone dryness wearing off. By the end of week one, daily cuticle oil usually restores flexibility and shine. By week two or three, new growth at the base looks smooth and strong. That new growth is the real sign of recovery, and it is why a short break after you remove acrylic nails at home is worth more than any single product.

When to See a Professional
Most removals go smoothly, but see a nail professional or a dermatologist if you notice pain that does not fade, swelling or redness around the nail, green or dark discoloration under the nail, or a nail lifting away from the nail bed. These can be signs of irritation or infection that need a professional look, and they are not something to treat at home.
The same applies if an acrylic was applied over an already damaged or infected nail. This guide gives general information only, not medical advice, and a professional can tell you whether your nails need treatment before any new set goes on.
When in doubt, ask sooner rather than later. A quick professional opinion costs far less than weeks of guessing, and a good salon or dermatologist will tell you honestly whether your nails simply need time or need treatment first.
Final Thoughts
Once you know how to remove acrylic nails at home, the process stops being intimidating. The foil method is the fastest and most reliable, the warm soak is a solid backup, and either way the rule is the same: soak fully, push gently, and never force anything. Your natural nails will thank you for the patience.
Give them a week or two of cuticle oil and short lengths, and they will be ready for whatever you want to try next. If you found this guide useful, the rest of the site has the same plain-language approach to every nail topic, from shapes to seasonal designs.
The next time your acrylics grow out, you will already know how to remove acrylic nails at home without a salon trip, and the whole routine will take half the time it took today. That confidence is the real payoff: no more picking, no more damage, and nails that stay healthy between sets.
Frequently Asked Questions
How long does it take to remove acrylic nails at home?
Usually 30 to 45 minutes in total. Filing takes about five minutes, the acetone soak takes 15 to 20 minutes, and pushing off the softened acrylic plus light buffing takes another ten. If this is your first time learning how to remove acrylic nails at home, allow a full hour so nothing feels rushed. If your acrylics are very thick or long, add an extra ten-minute soak rather than rushing the removal.
Can I remove acrylic nails at home without acetone?
You can file them down and soak in warm soapy water, but it is much slower and rarely removes everything cleanly. Acetone is the solvent that actually dissolves acrylic, so the no-acetone route means a lot more filing and a higher chance of thinning your natural nails. For most people, the acetone methods for how to remove acrylic nails at home are both faster and gentler than the no-acetone workaround.
Will removing acrylic nails at home damage my natural nails?
Not if you soak them off properly. Damage comes from ripping, peeling, or prying acrylics off, which pulls up layers of your natural nail. The patient method for how to remove acrylic nails at home, with a full acetone soak and a gentle push-off, keeps your nails intact, and they recover quickly with cuticle oil and a short break.
How often can I remove and reapply acrylic nails?
There is no fixed rule, but most nail professionals recommend a short break between sets, especially if your nails feel thin or sore after removal. A week or two of cuticle oil, short lengths, and no enhancements is enough for most people. If your nails stay weak or keep breaking after you learn how to remove acrylic nails at home, extend the break and let them fully recover before the next set.
What should I do if the acrylic will not come off after soaking?
Re-wrap the nail with fresh acetone-soaked cotton and give it another ten minutes. Thick acrylics and strong top coats sometimes need a second soak. If it still resists after that, file the surface again lightly and soak once more. Never force it off: a nail that will not budge is simply not ready yet, and that patience is the core skill of how to remove acrylic nails at home.
How do I strengthen my nails after I remove acrylic nails at home?
Start with cuticle oil twice a day and a rich hand cream, keep your nails short, and avoid harsh removers and picking. A strengthening base coat can add protection while they recover. Most nails feel noticeably stronger within two to four weeks of consistent care, and a break from enhancements during that time makes the biggest difference.
Compare Before You Choose
See the Closest Alternatives
Compare nearby shapes, colors and finishes before picking a final reference.
Recommended Next



Pingback: How to Strengthen Nails: 12 Proven Tips for Stronger Nails